(Yup, this was the post that I meant to get up before I traipsed off to Atlanta, GA for a week of above average warm temperatures and sunshine and getting to meet a blogger buddy IRL, but more about that later...)
Here's the deal. As a kid I lived in a fairly poor family. And we got pretty creative when it came to giving gifts for Christmas. Looking back on that time now, I'm grateful for the things I learned from that experience.
My mother would save up to get some parts for this particular project, but most of it is recycled or found stuff. With a little time and your own artistic interpretation, the result is something like this:

A lovely live centerpiece that will last throughout the season!
Around here, we almost always get a good storm at Thanksgiving time. So afterwards it's not too hard to find greenery that can be used for this project. Since I am allergic, I use gloves when I go hunting around for this stuff and any time I am handling the greens during this project. If you want to try this yourself, you will also need:

Photo credit: shroomery.org
Those little plastic containers that lunch meat comes in or you can buy as sets with lids.

Photo credit: floraldesigninstitute.com
Some floral foam called wet foam or oasis, that you soak in water for several hours prior to the start of the project. This is the most expensive part. I used coupons at my local Michaels craft store a couple weeks in a row to get this stuff.
You will also need an icepick, a sharp knife, small scissors, some wire- preferably green colored, some floral picks or other glittery doo-dads and some taper candles. I had several taper candles of different colors just hanging around the house that I used.
When I know I am about to make these, I set my wet foam in a sink full of water. Just float them on top and they will sink as they fill up with water. Do this several hours ahead of time. Then head out to a park or street that has some greens you would like to use. I only take the ones that are on public property and have been blown down. I do not recommend strategic trimming as local law enforcement might frown on that!
So once you have a good amount of greens to choose from- it takes me about a garbage bag full to make a half dozen or so of these centerpieces, it's a good idea to clip apart the pieces from the branches and group them into about three sizes- your large base pieces, some medium ones and then the smaller pieces that will be used to fill in at the top near the candle.
The size that the wet foam comes in is about the size of a brick and I divided it into 3 equal parts that were just right for fitting inside the plastic containers. Do this by cutting with a sharp knife when the foam is full of water. When the wet foam pieces are inside the containers, you are ready to start the artsy part!
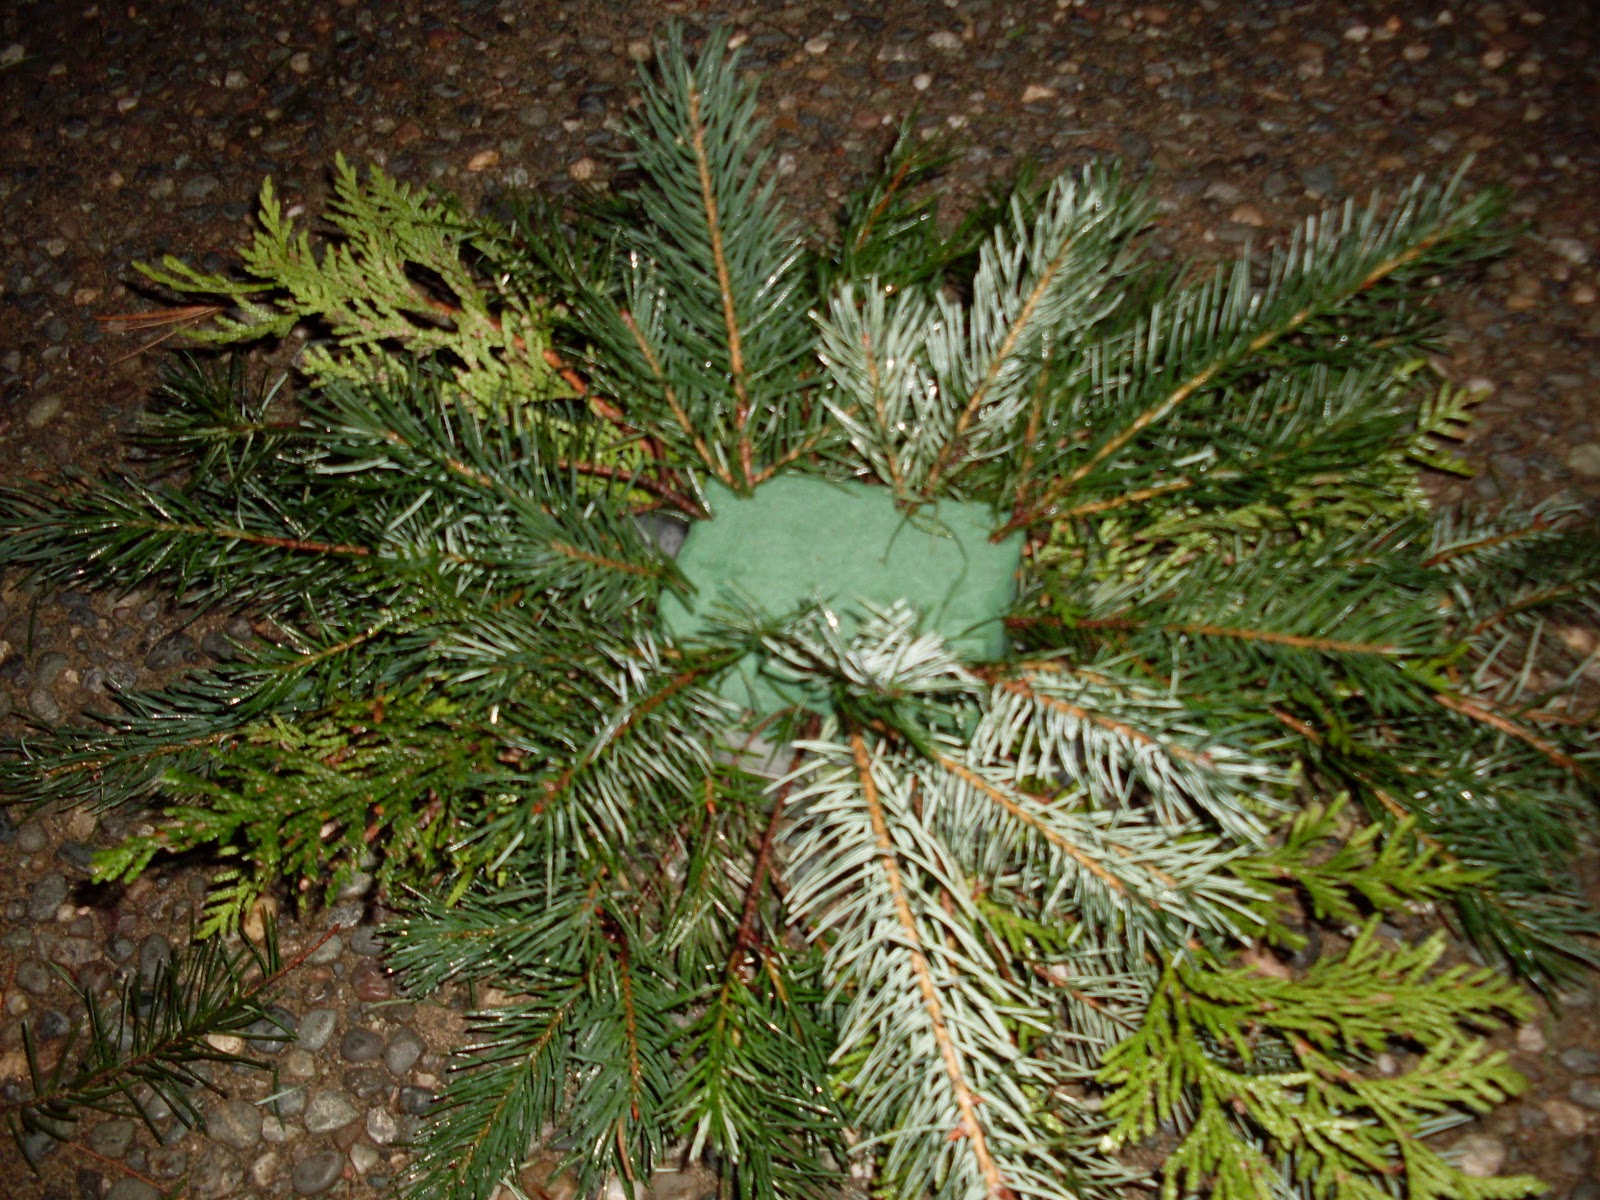
For extra stability and balance of the piece, it is good to put the first larger greens into the foam by actually running them through the plastic container. You need to be careful to keep them at the top of the plastic container and not allow too big of holes to accomplish this so that the water in the foam won't end up leaking all over peoples tables or mantles later. I do this by using an icepick to poke two holes down each long side and one on each end of the plastic container and then making the holes big enough to let the greens through with a little snip of the scissors if needed.


Next, you get to just pretty much go crazy with your design. I did mine with an oval shape, but you can do it more round or just totally asymmetrical if you want. The only things that I keep conscious of at this point is that I want the design to eventually work down to smaller pieces at the top and that I want to leave space in the middle of the foam for my candle. Just keep working away at it by adding greens into that foam.


Next, you get to just pretty much go crazy with your design. I did mine with an oval shape, but you can do it more round or just totally asymmetrical if you want. The only things that I keep conscious of at this point is that I want the design to eventually work down to smaller pieces at the top and that I want to leave space in the middle of the foam for my candle. Just keep working away at it by adding greens into that foam.


When you have the foam pretty much covered, it's time to add your candle so you can be sure that it fits. I take the bottom of the candle down a bit and 'sharpen' it up so it stays steady in the foam. I do this by whittling it down some with the sharp knife. The candle doesn't have to be put in the center as I did, either.


Now, it's time to add the last pieces of greenery to cover up the rest of the foam and even things out as you wish.

Lastly, you get to add those sparkly things that finish off the piece. This is where the green wire comes in. That way you don't have to be too careful about hiding the wire. It pretty much disappears into the greenery.


You could even add a bow or other goodies. Sometimes I even put the finished project into a pretty shallow bowl if I want to add a more lasting gift along with the decoration. Your friends, neighbors, coworkers, or even boss will love these and if you're not allergic as I am, you could even keep one for yourself!


You could even add a bow or other goodies. Sometimes I even put the finished project into a pretty shallow bowl if I want to add a more lasting gift along with the decoration. Your friends, neighbors, coworkers, or even boss will love these and if you're not allergic as I am, you could even keep one for yourself!
Beautiful! What a great gift and craft idea!
ReplyDeleteLove it!
Merry Christmas!
Merry Christmas!
ReplyDeletegorgeous! The guy gave me a whole bundle of branches when I bought the tree, but I ran out of time so I threw them out. Maybe soon you'll be my neighbor and I'll just get one for christmas. We can hope!
ReplyDeleteAnd a Merry Christmas to all of you!
ReplyDelete@ Michelle- yes, we can only hope. :)
My husband says he feels this is the last Christmas for us here. As much as I hate to admit it, he's usually right about these things...
Not even floral design school could teach me something like this! I've only learned how to arrange flowers, not make my own projects! This is such a great idea, and it looks really nice! I'll see if I can get some done for this Christmas!
ReplyDeleteHere's the deal. As a kid I lived in a fairly poor family. And we got pretty creative when it came to giving gifts for Christmas. Looking back on that time now, I'm grateful for the things I learned from that experience.
ReplyDeleteTriple and strong scented candles
luxury scented candles